How to Paint Flowers Step by Step with Dianna Shyne - Coral Rose
This is an excerpt from Dianna Shyne's 8-day flower painting course and challenge. If you want to learn from Dianna Shyne, paint GORGEOUS florals that will wow your friends, and see massive growth in your artwork, then this challenge is for you. Click the button below to get started
There is nothing more difficult for a truly creative painter than to paint a rose, because before he can do so he has to first forget all the roses that were ever painted.” – Henri Matisse
The combo of painters and gardening is as old as painting itself. Claude Monet was perhaps the most famous gardener-painter.
Ann-Dumas once said ‘No other artist was as serious a gardener or as knowledgeable.’
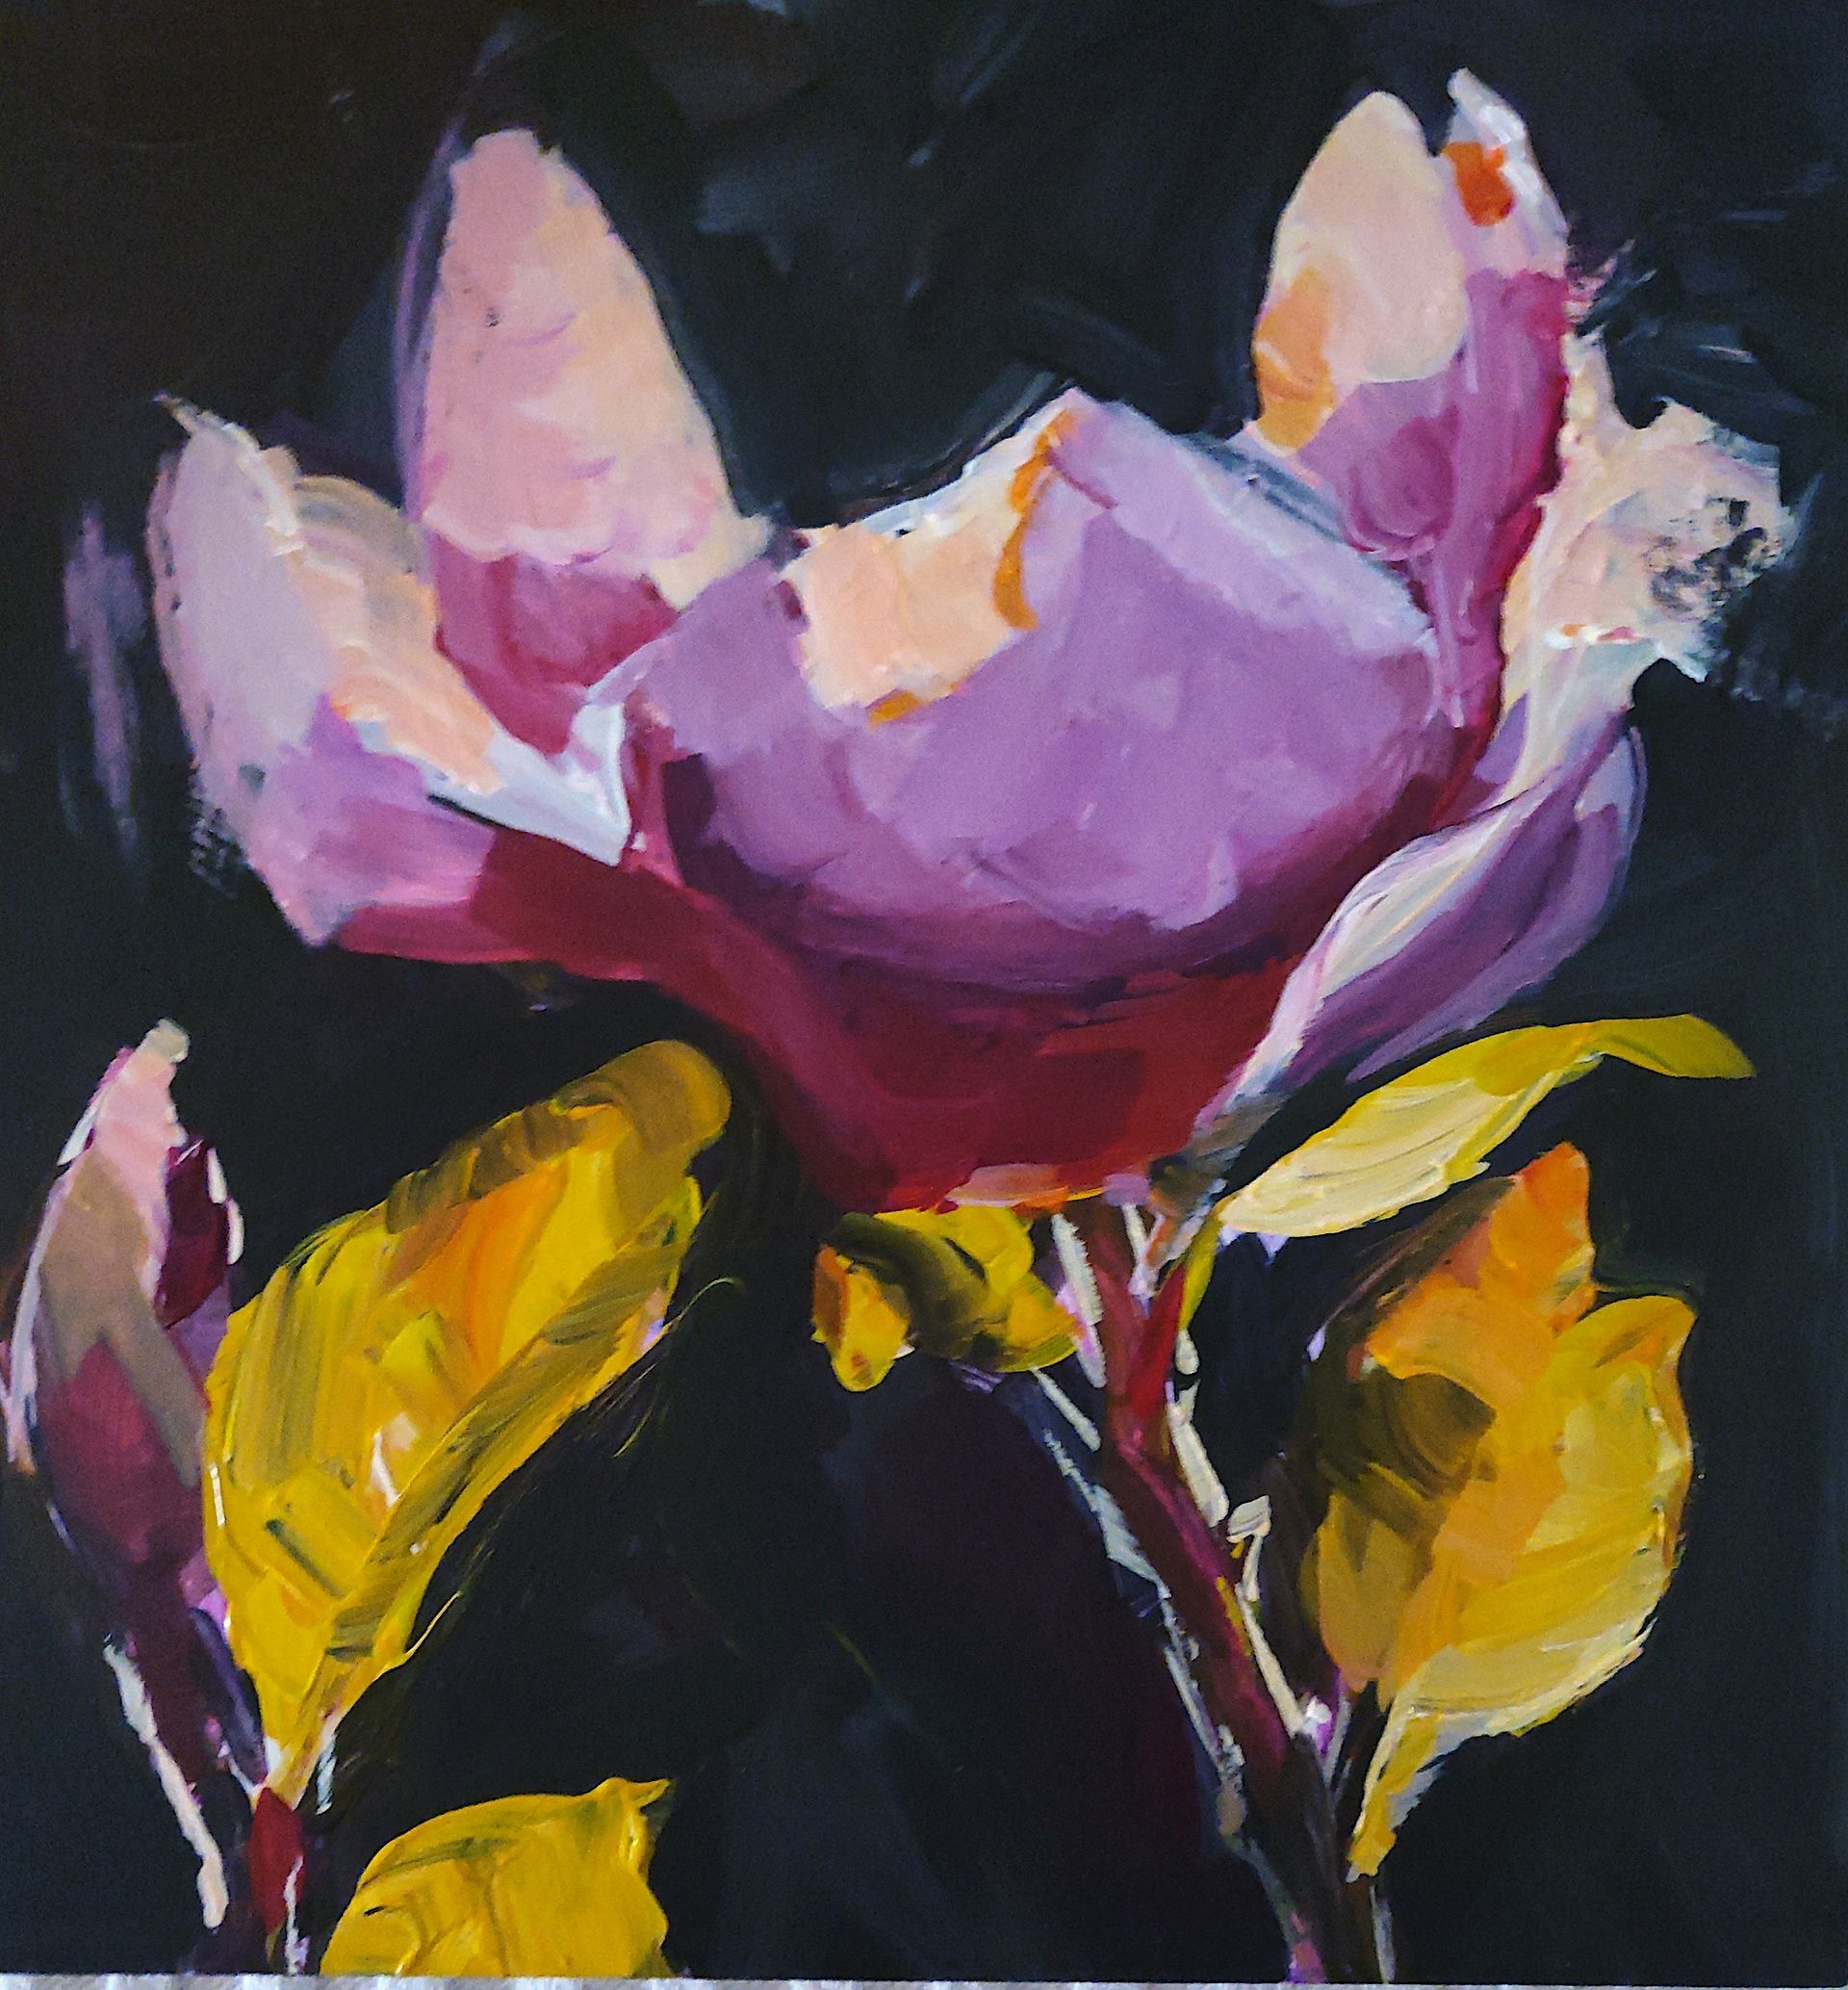
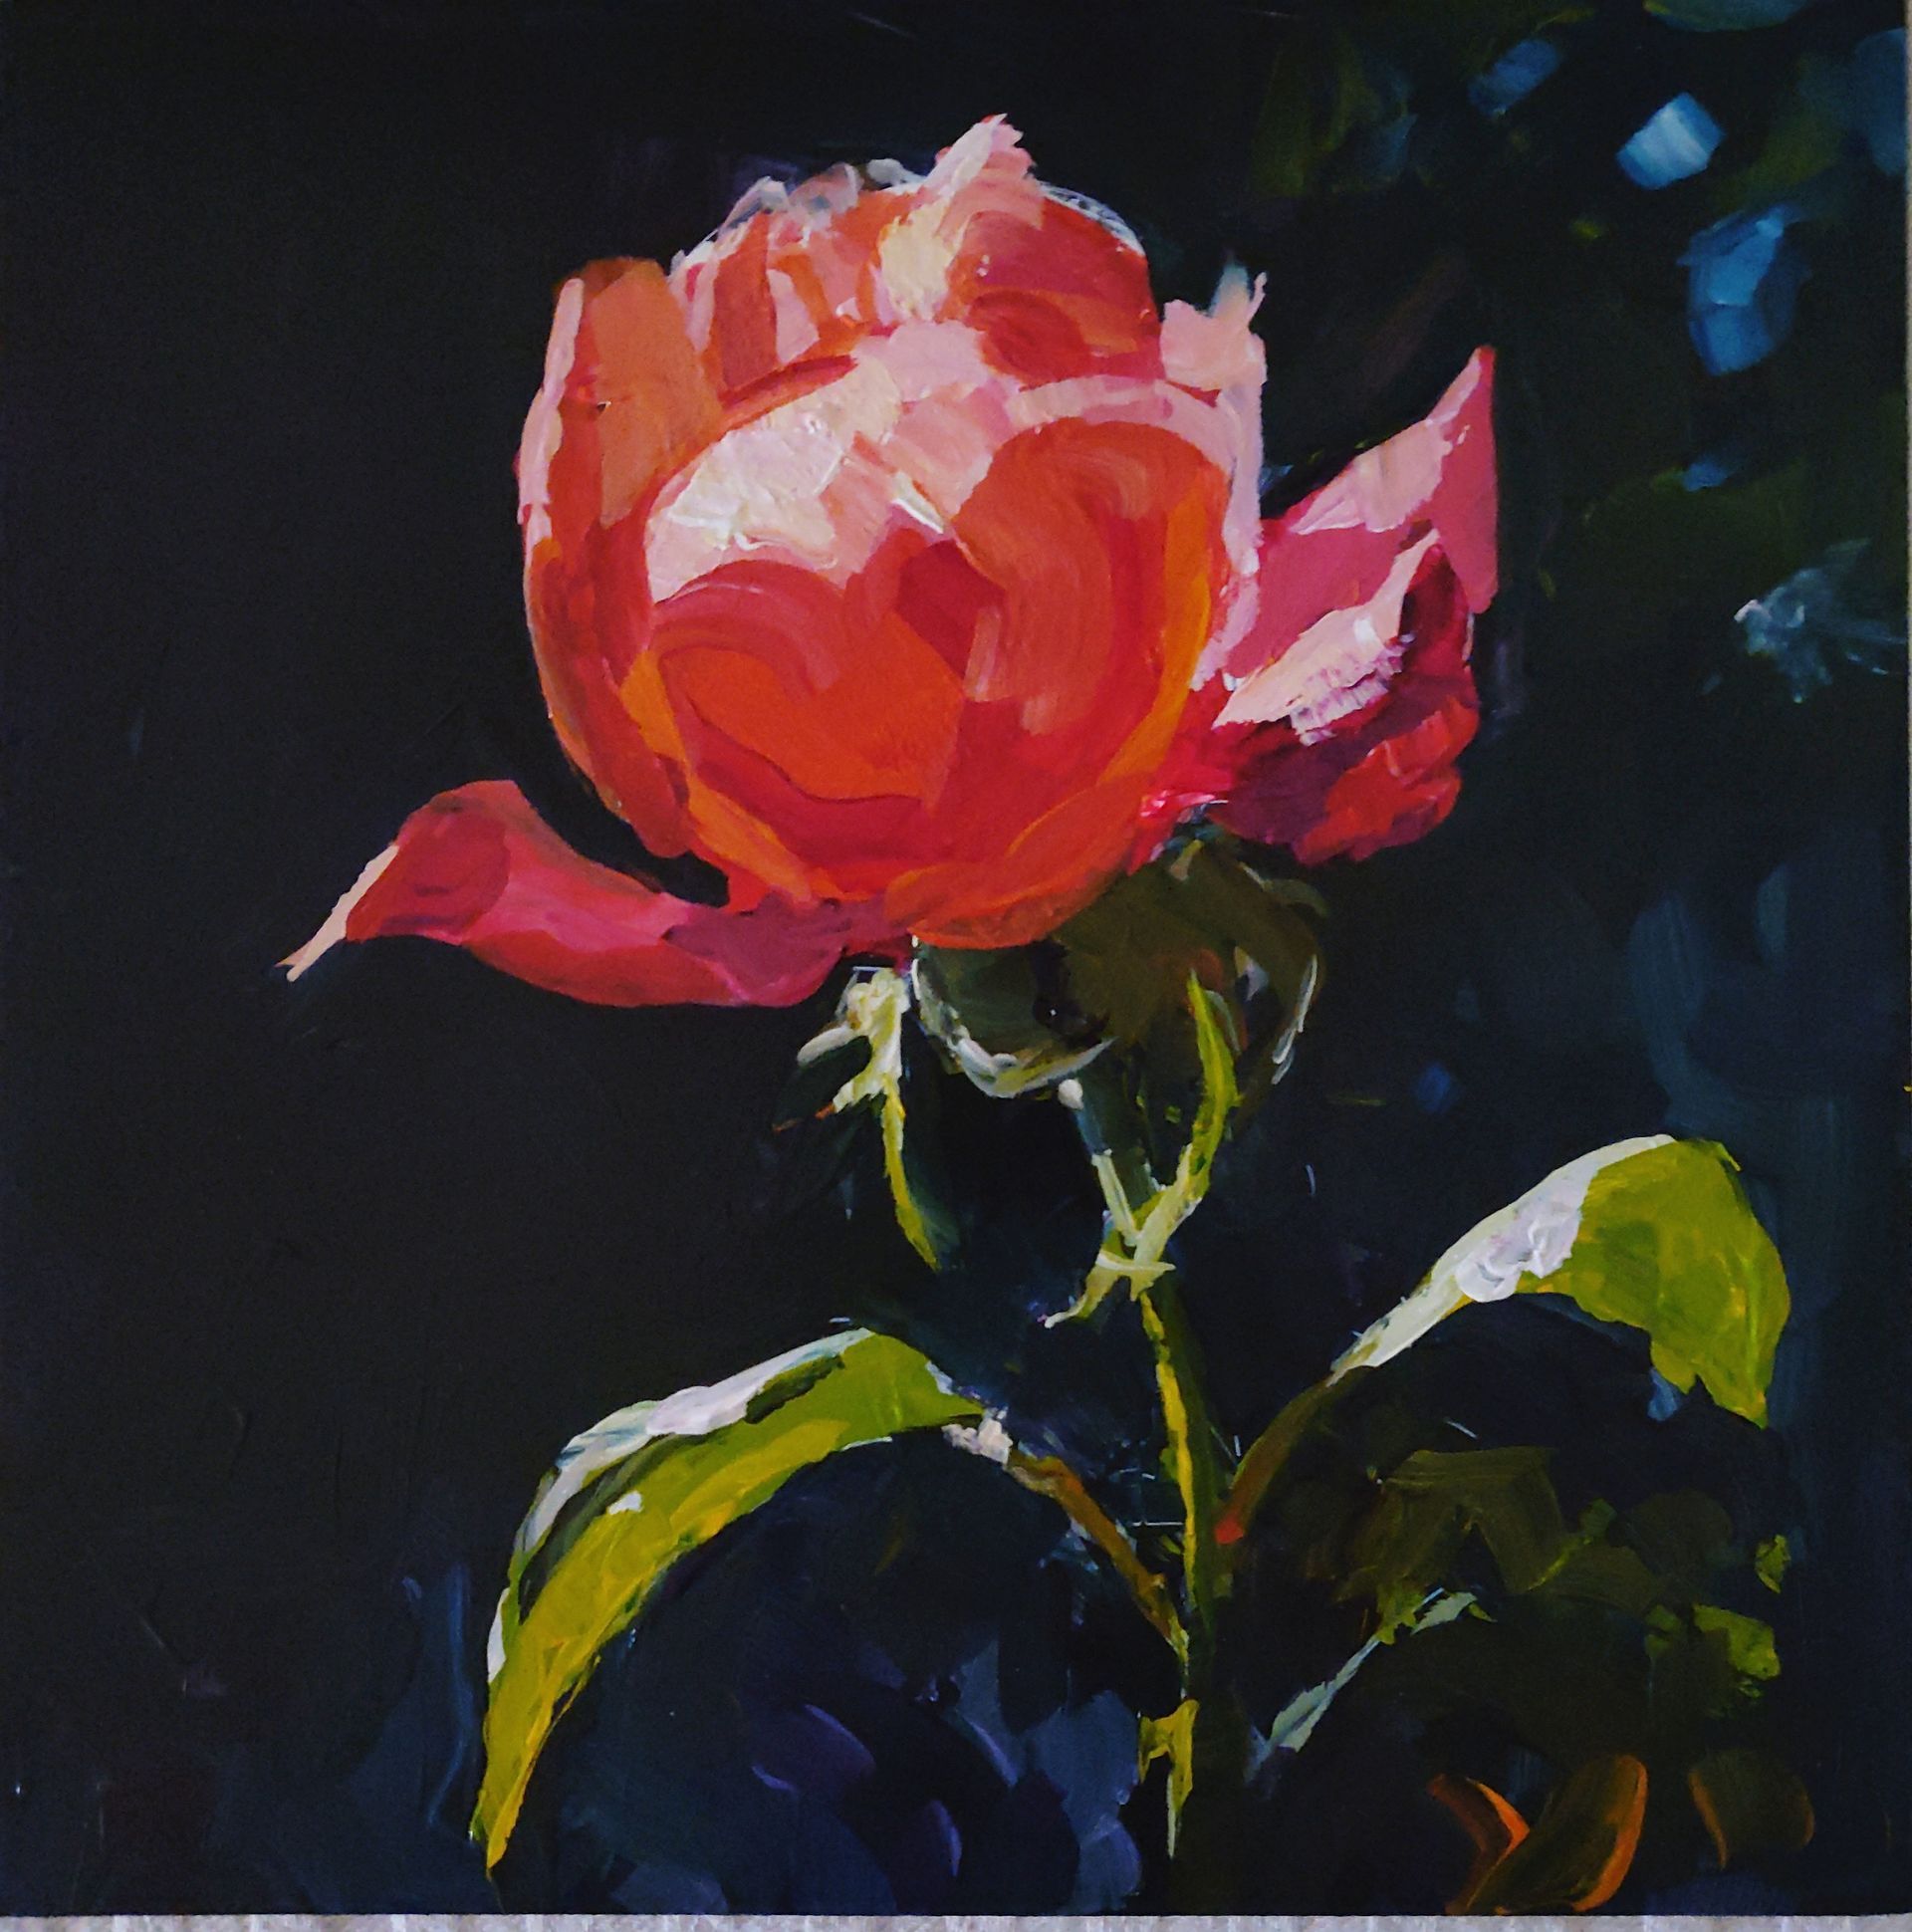
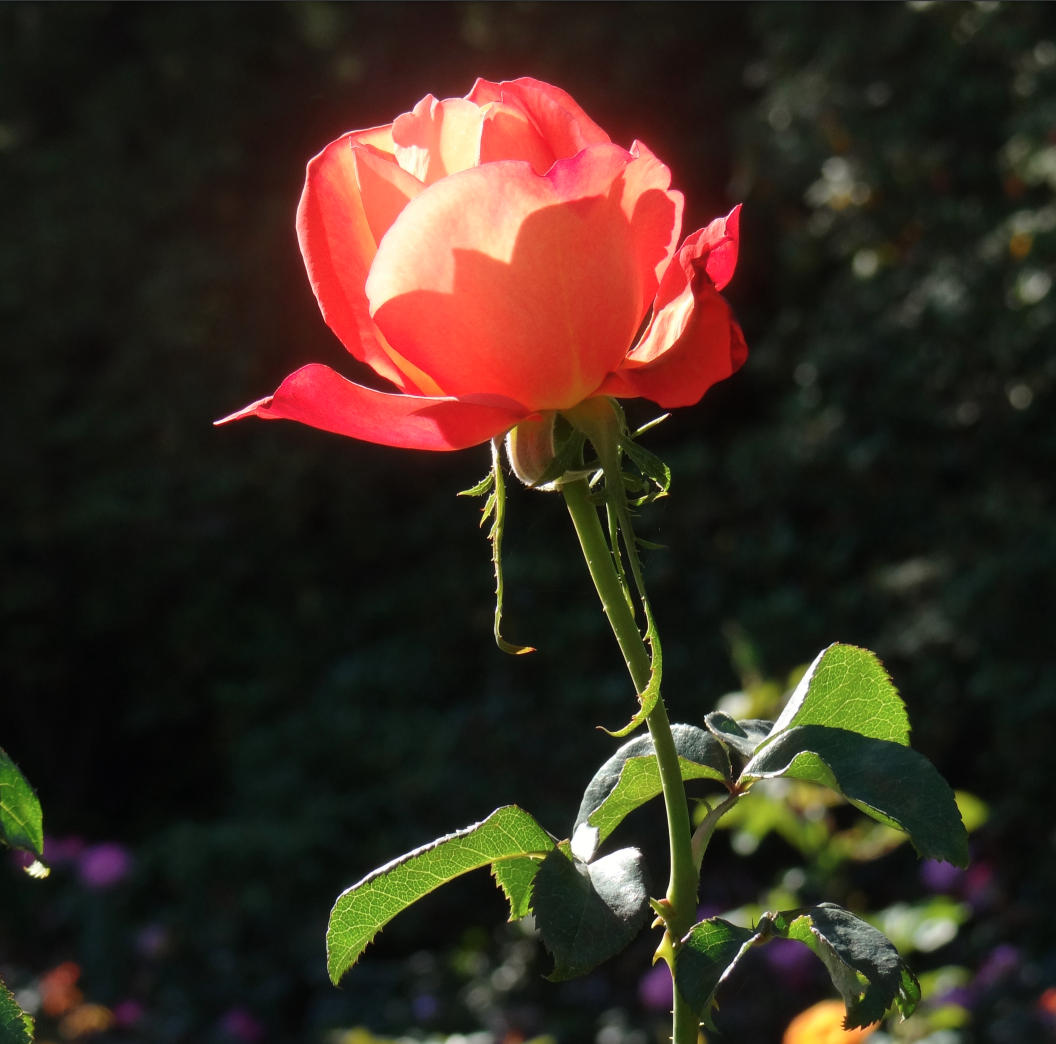
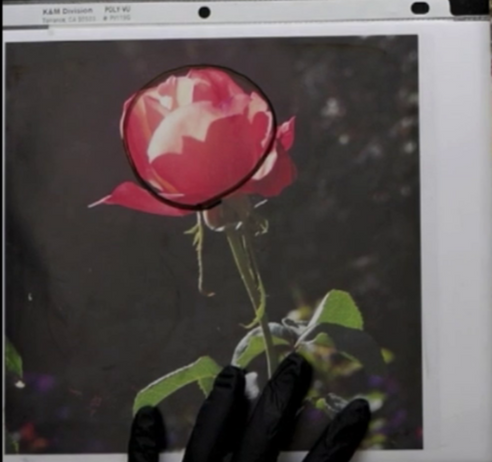
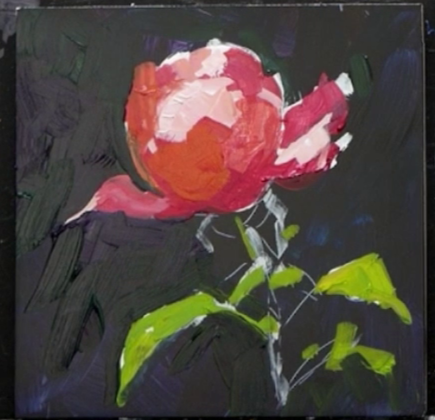
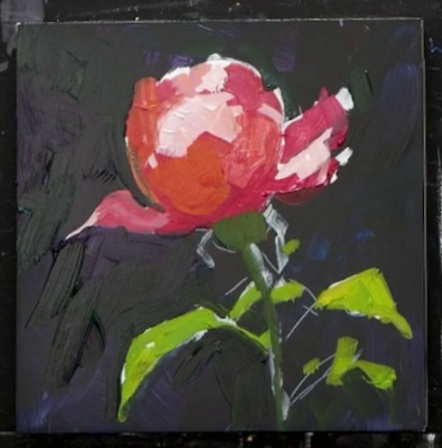
Our wonderful instructor Dianna Shyne is faithfully continuing that tradition. She has hundreds if not thousands of reference photos from her own garden and today she’s going to teach you how to paint a flower step-by-step. Her flower of choice is a rose and this is the rose she'll be painting:
We'll be covering a huge range of topics today such as how to paint flowers, color mixing with Acrylic Paints, toning your background, a unique way to sketch your composition and much much more. Let's get started!
Colors and Supplies
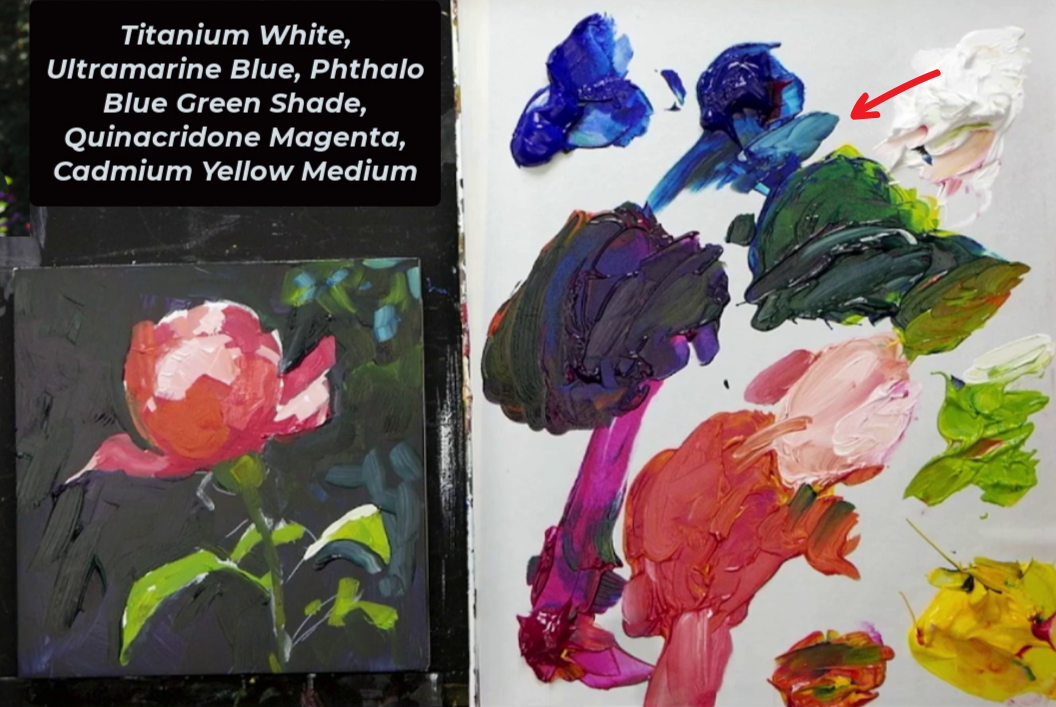
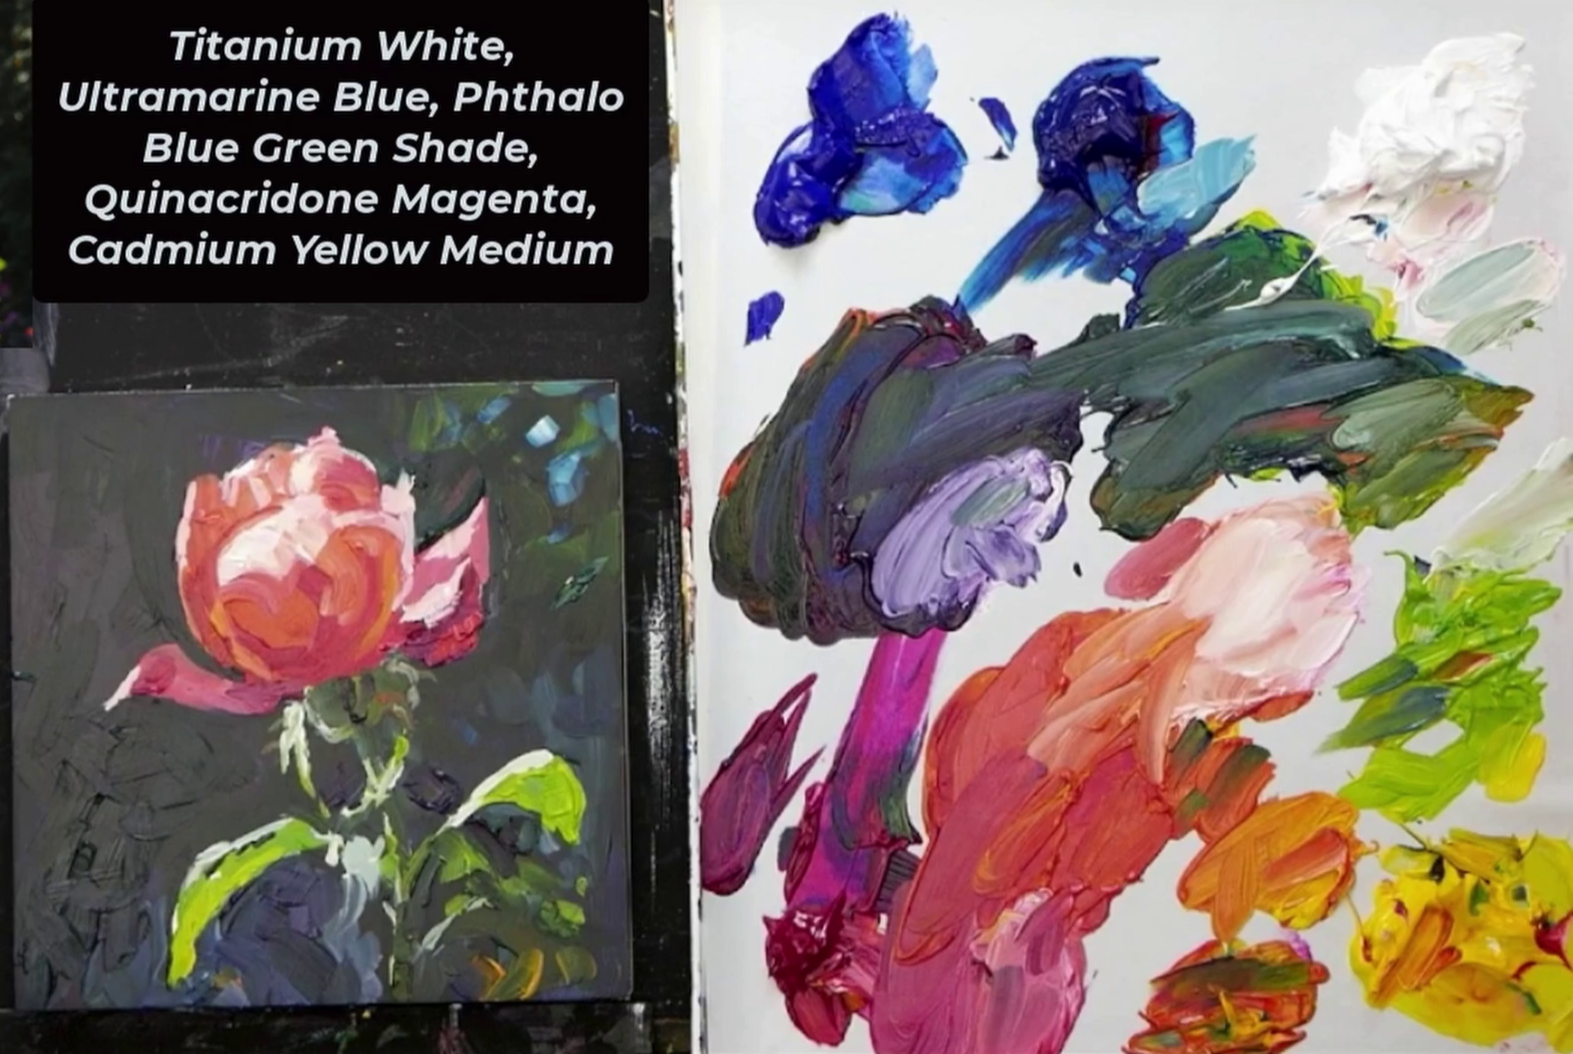
I’m going to walk you through everything that’s going through my mind as I’m preparing for a painting! The colors I'm going to be using today are:
- Titanium White
- Ultramarine Blue
- Phthalo Blue (Green Shade)
- Quinacridone Magenta
- Cadmium Yellow Medium
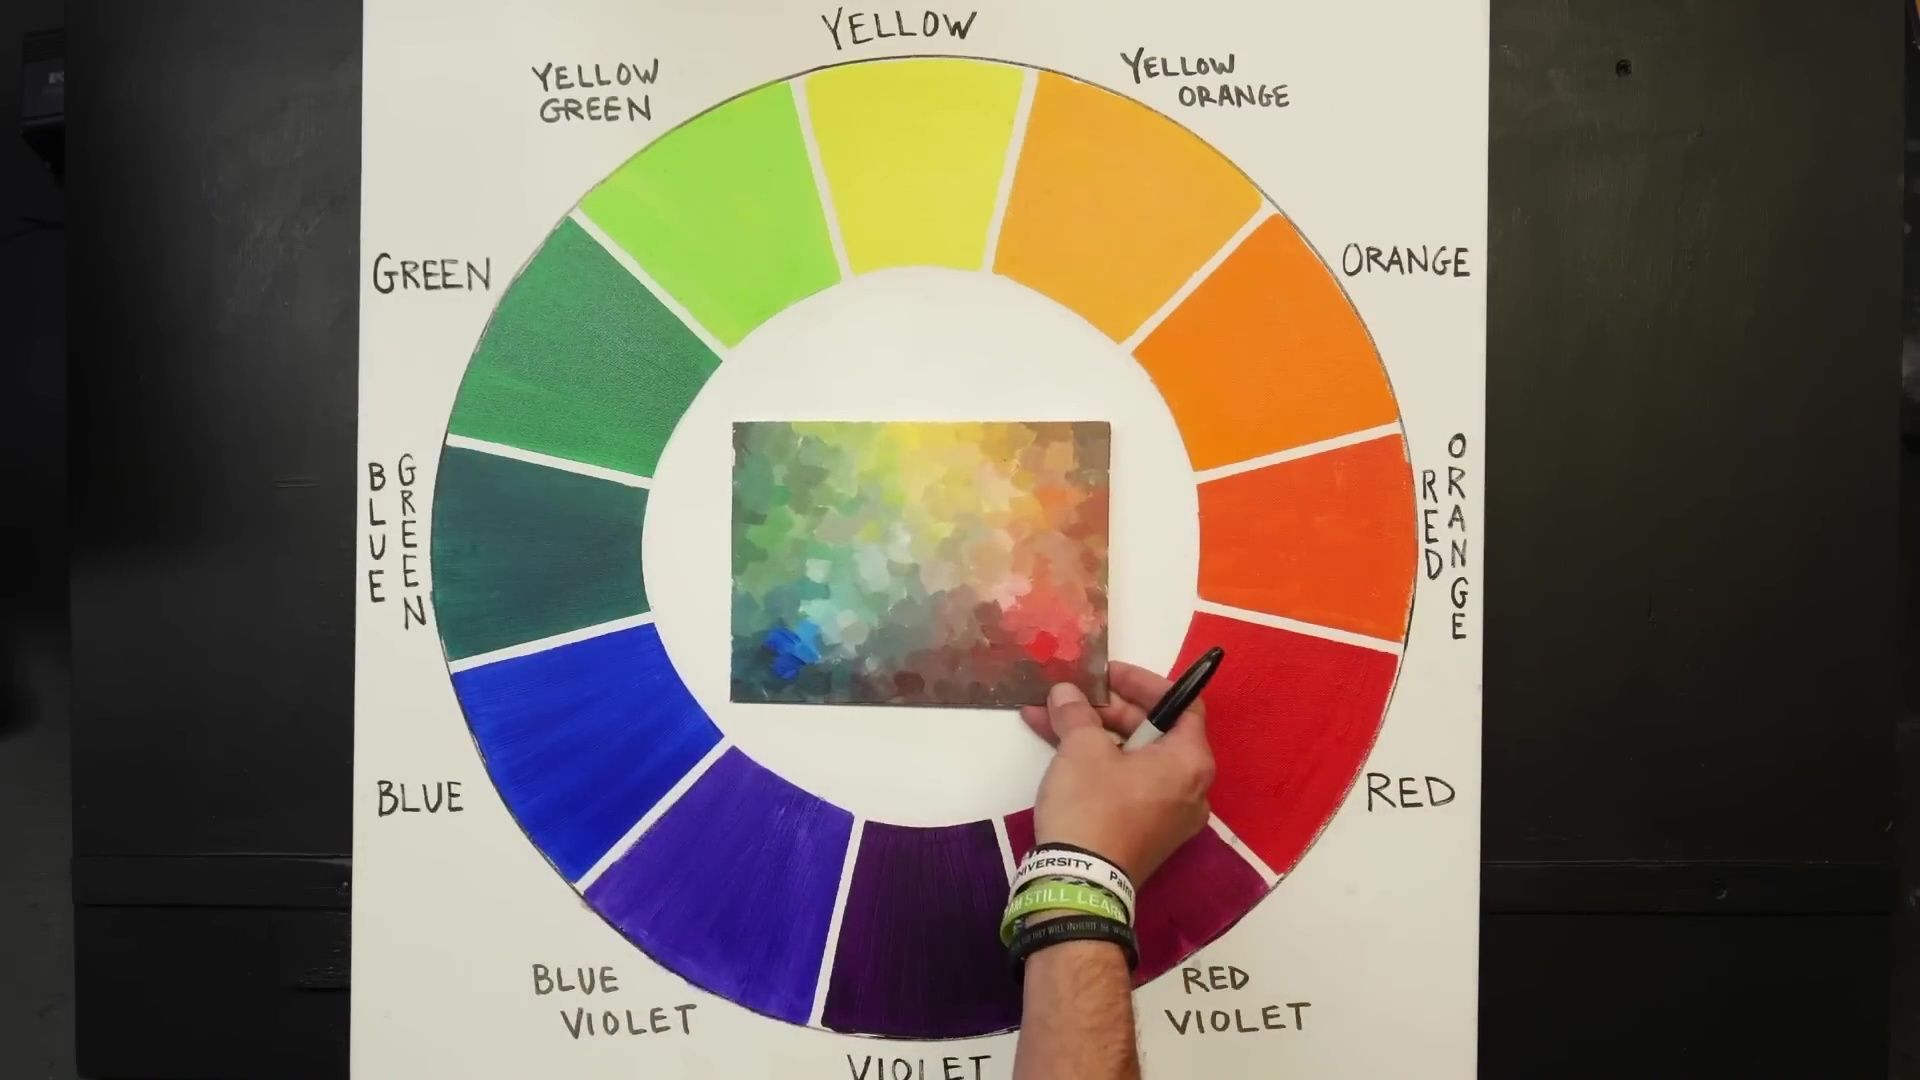
If you're new to Acrylic Painting or aren't sure what colors you should put on your palette, we wrote an article about the essential colors Acrylic painters should use here. We like to use a limited palette - it saves you money and helps your painting have a better color harmony.
As for my other supplies, this is what I’ll be using today:
- 8x8 White Stretched Canvas
- Princeton Catalyst Flat Brush. These are my favorite brushes. They're very high quality, last a long time and have a good feel while you're using them.
- The incredible Masterson Sta-Wet Palette. This keeps your Acrylic Paints from drying out as you're using them. It's a life changer for Acrylic Painters. I don't know if I could do what I do without it. There's nothing else like it on the market - it's worse the investment! If you haven't set one up yet, we wrote an article about that here
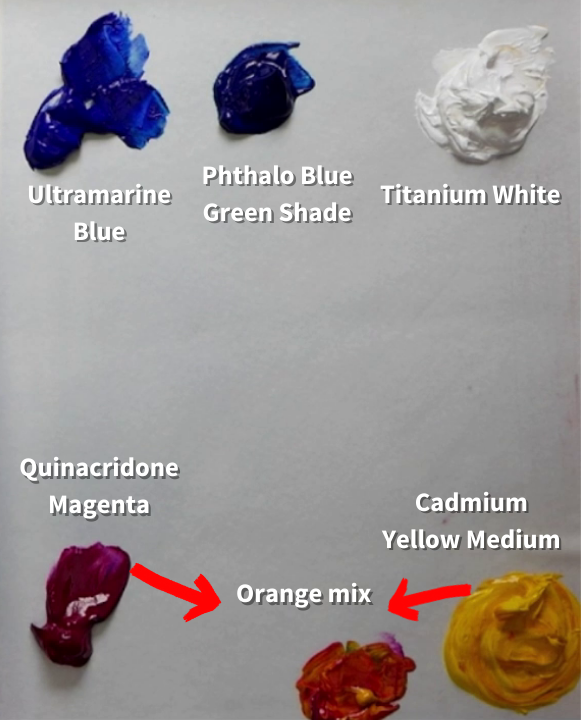
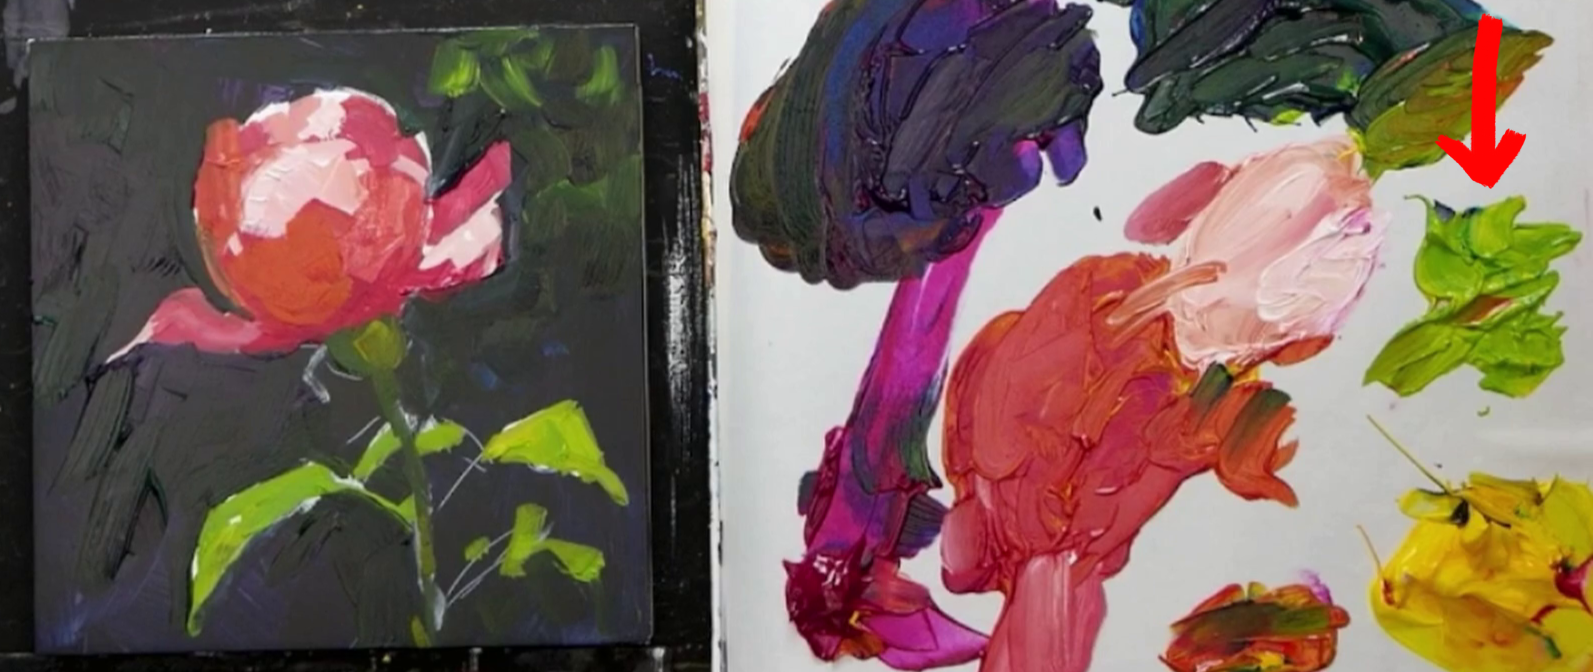
You’ll notice a 6th color in the bottom middle of my canvas. This is an orange color I created by mixing Magenta and Yellow. It was left over from another painting and I did not want to waste it. It could be helpful for today’s painting but it’s not a necessary color to have.
Preparation
Lots of things go through my head when I’m choosing a reference photo. For this painting, I chose this photo because it has a very dark background. That way we can focus on the rose itself and not worry too much about what’s behind it. We want to focus on how we can really mold and shape this rose using darks and lights in the environment.
Another thing to note - we are working on a small 8x8 canvas. If we copy the reference photo perfectly to the canvas, most likely the whole flower will not fit. This is a problem because we want to sketch out the side petals, stem and leaves as well. To solve this problem, I am planning on shortening the stem of the flower so we can fit both the blossom and the bright green leaves in our composition. If we make the blossom too small, it will be hard to add the details we want later on so I’ll also make the blossom a bit bigger than the actual reference.
Remember: YOU ARE THE MASTER OF YOUR PAINTING!
Next thing I’m thinking about is the shape of my subject. First, I want you to look at the general shape of this rose. It has some petals on either side but the basic shape is a circle. We want to keep this in mind as we start to think about the placement of the flower on our canvas.
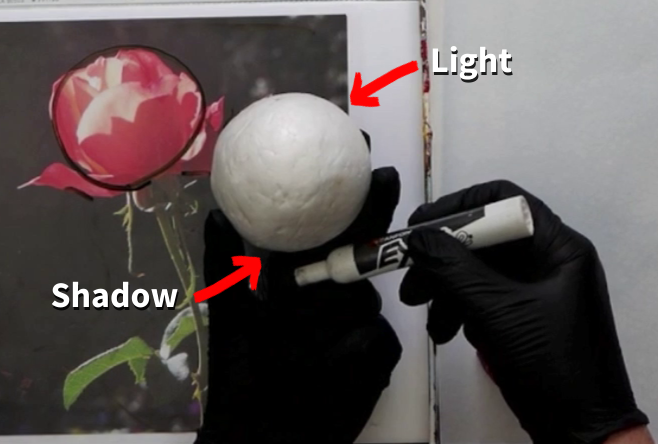
Next, let’s take a look at the light. If we look at a sphere, we notice that the ball is lit on the top side, and shadowed on the bottom side. We will see this same concept in the light and dark areas of our rose. Our lightest portions will be at the top and our darkest portions will be at the bottom.
Sketching
With all of those things in mind, let’s start painting our subject!
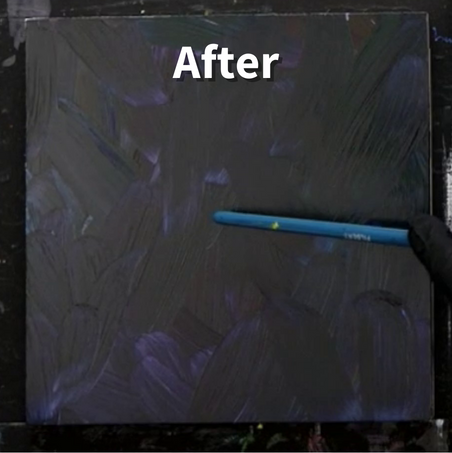
We will start by painting the canvas a deep rich color to create a good dark base for our background. I do this for a few reasons but one big reason is that when you paint a scene like this directly on a white background, you tend to have bits and pieces of the white canvas showing all over the place. We don’t want that - we want the focus to be entirely on our beautiful rose subject.
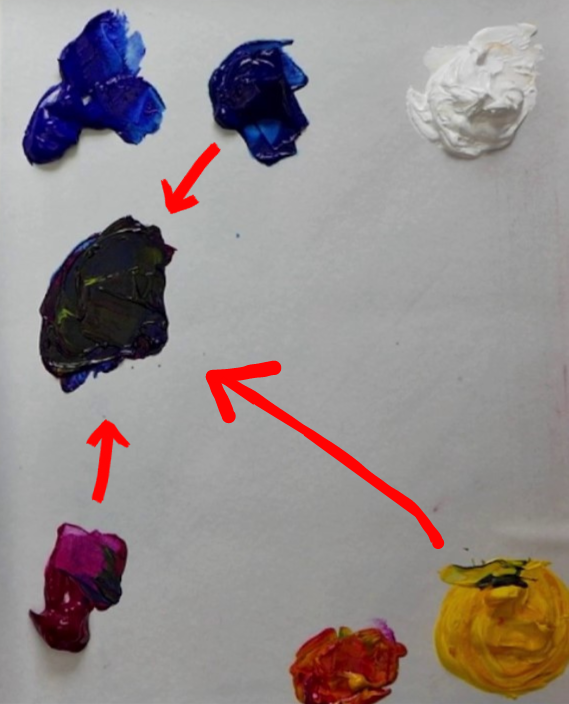
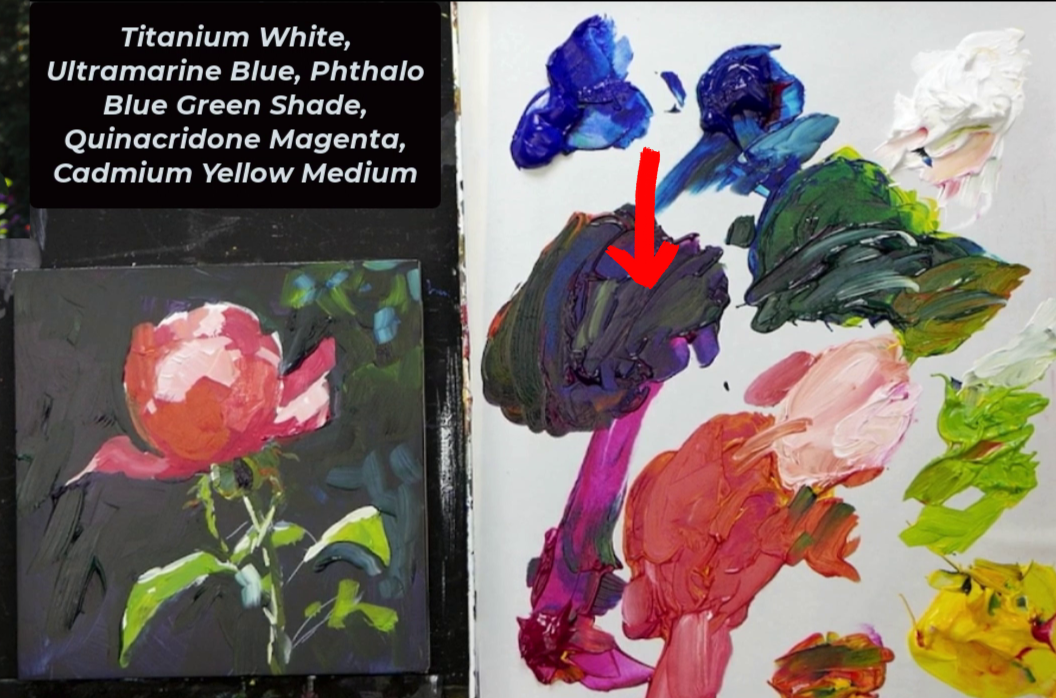
To mix the color for our background, we will take Phthalo Blue Green Shade, Quinacridone magenta, and a tiny touch of Cadmium Yellow Medium. This is going to make a very dark blue/purple color.
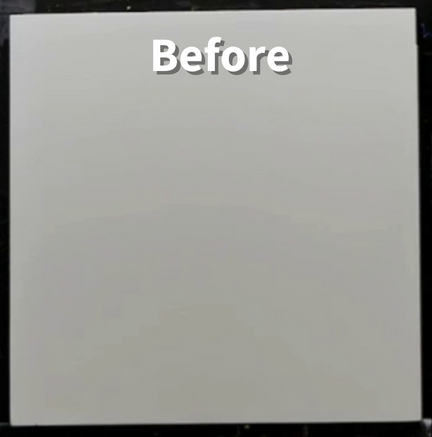
Here's what the canvas looks like before and after we tone it:
Now before the paint dries, scratch your circle shape into the background paint using the tail end of your brush. We want to keep the circle out of the exact CENTER of your painting - it’s more pleasing to the eye if we put it off center. This will be your blossom. Be sure to make the blossom a bit bigger than in the reference photo as we talked about earlier.
Next, let’s sketch out the side petals, stem and leaves by scratching the paint in the same way.
Because of our canvas size, it’s likely the whole flower will not fit. Therefore, I am going to shorten the stem of the flower so we can fit both the blossom and the bright green leaves in our composition.
The blossom is so important - every other piece of the painting serves the blossom. If the blossom is too small, we can’t add the details to it that we want later on in the painting.
We want our background color to dry completely before we start painting. I always use a hair dryer at this step to dry the paint completely.
Color Mixing
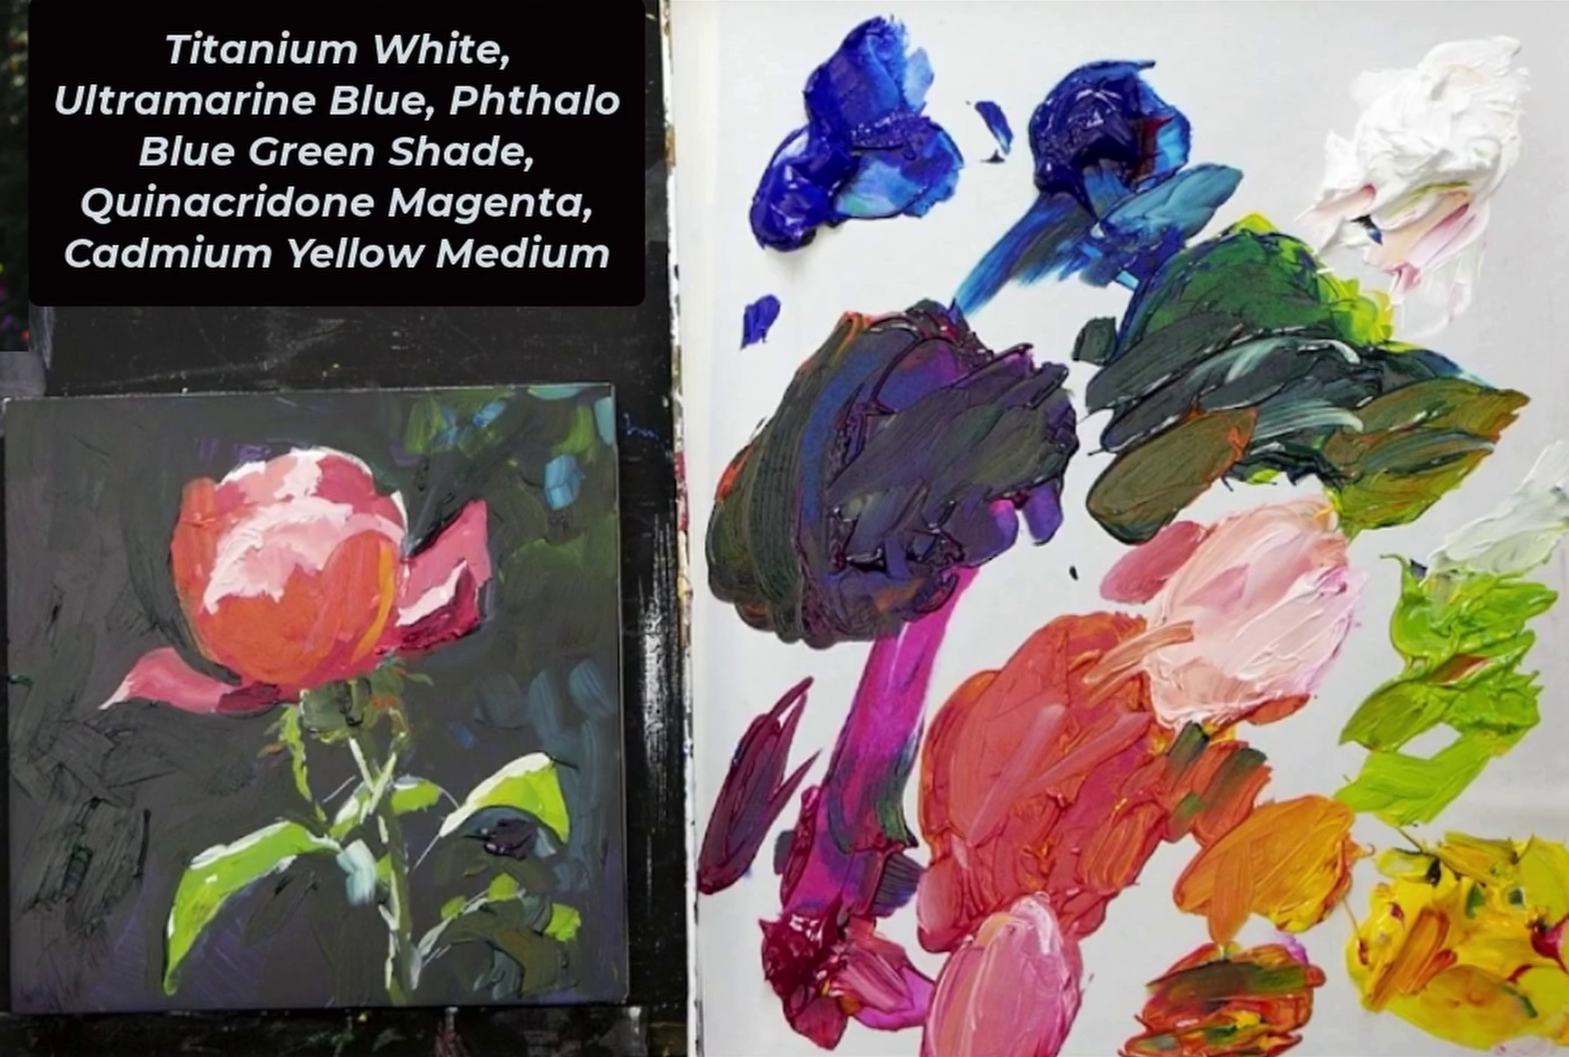
With the sketch out of the way, we are going to mix the main colors of this painting. There are a few different sets of colors that I’m going to pre-mix.
Mix 1: Blossom Colors
The first color we're going to mix is the color of the shadows on the blossom. It’s a reddish-orange color. To make that color we’re going to mix together our magenta and yellow. After you mix those colors together, look at your reference photo and adjust accordingly. Does your color need more magenta or yellow to match the shadows on the blossom?

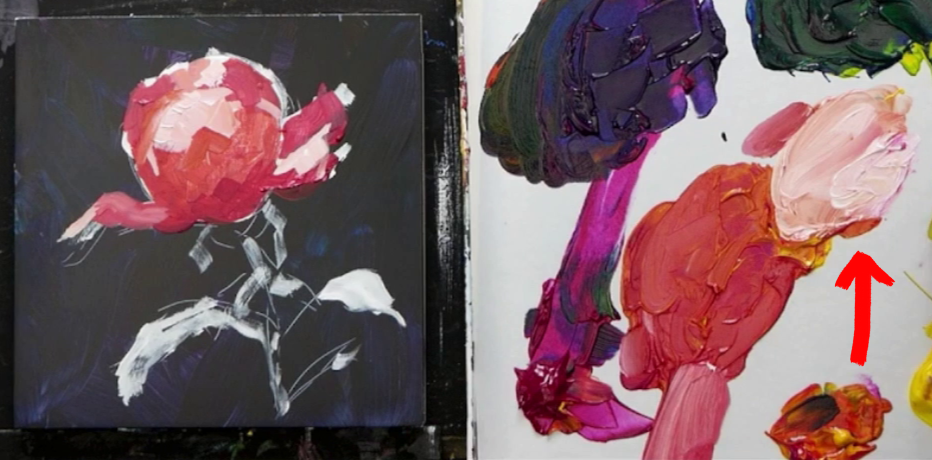
Next, we need to make a color for the parts of our rose that are being hit by the sunlight. This is easy. All we have to do is add a little bit of white to the red-orange color that we just mixed.
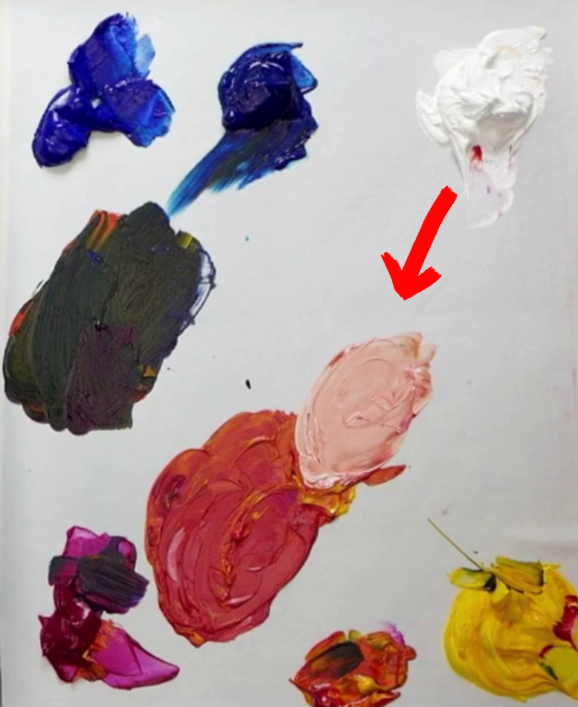
Voila! We now have our blossom colors.
We're going to need a lot of green colors for our paintings so we'll mix those next.
Mix 2: Stem Colors
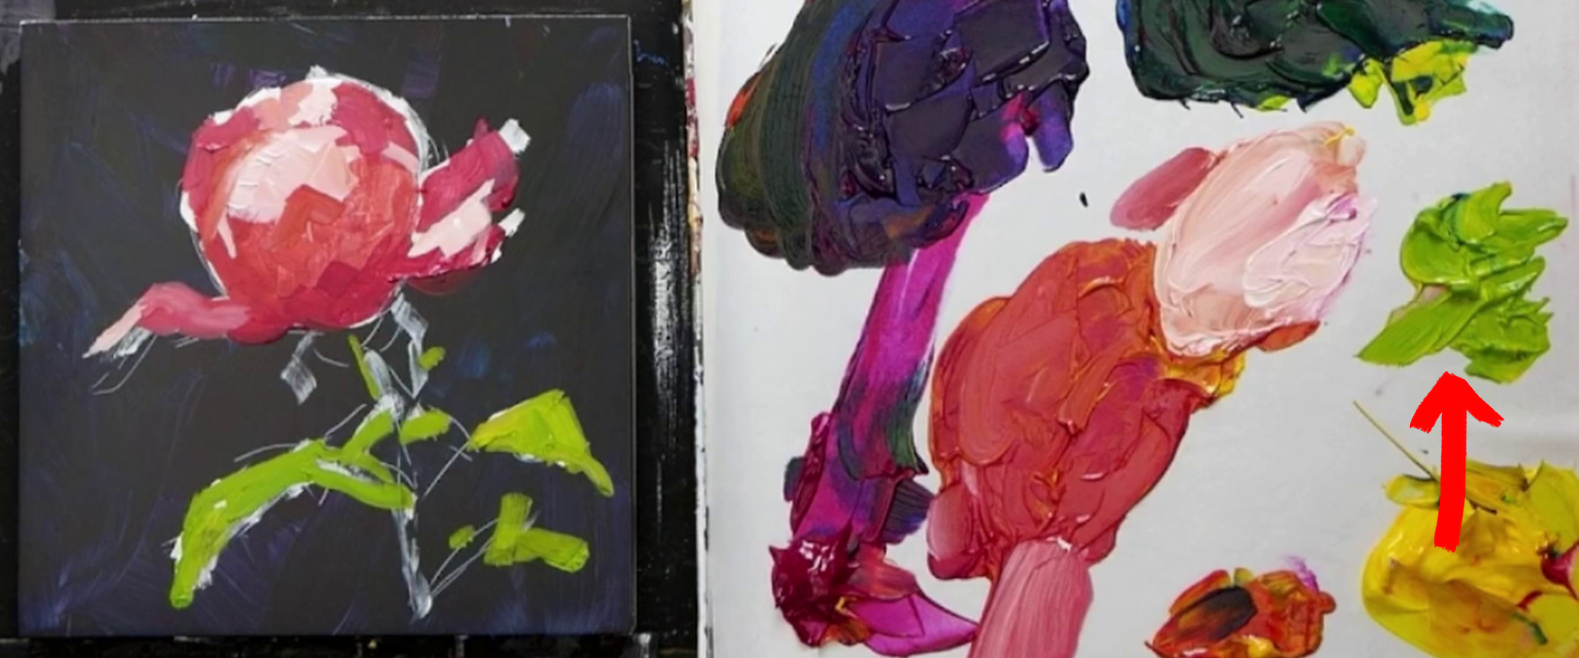
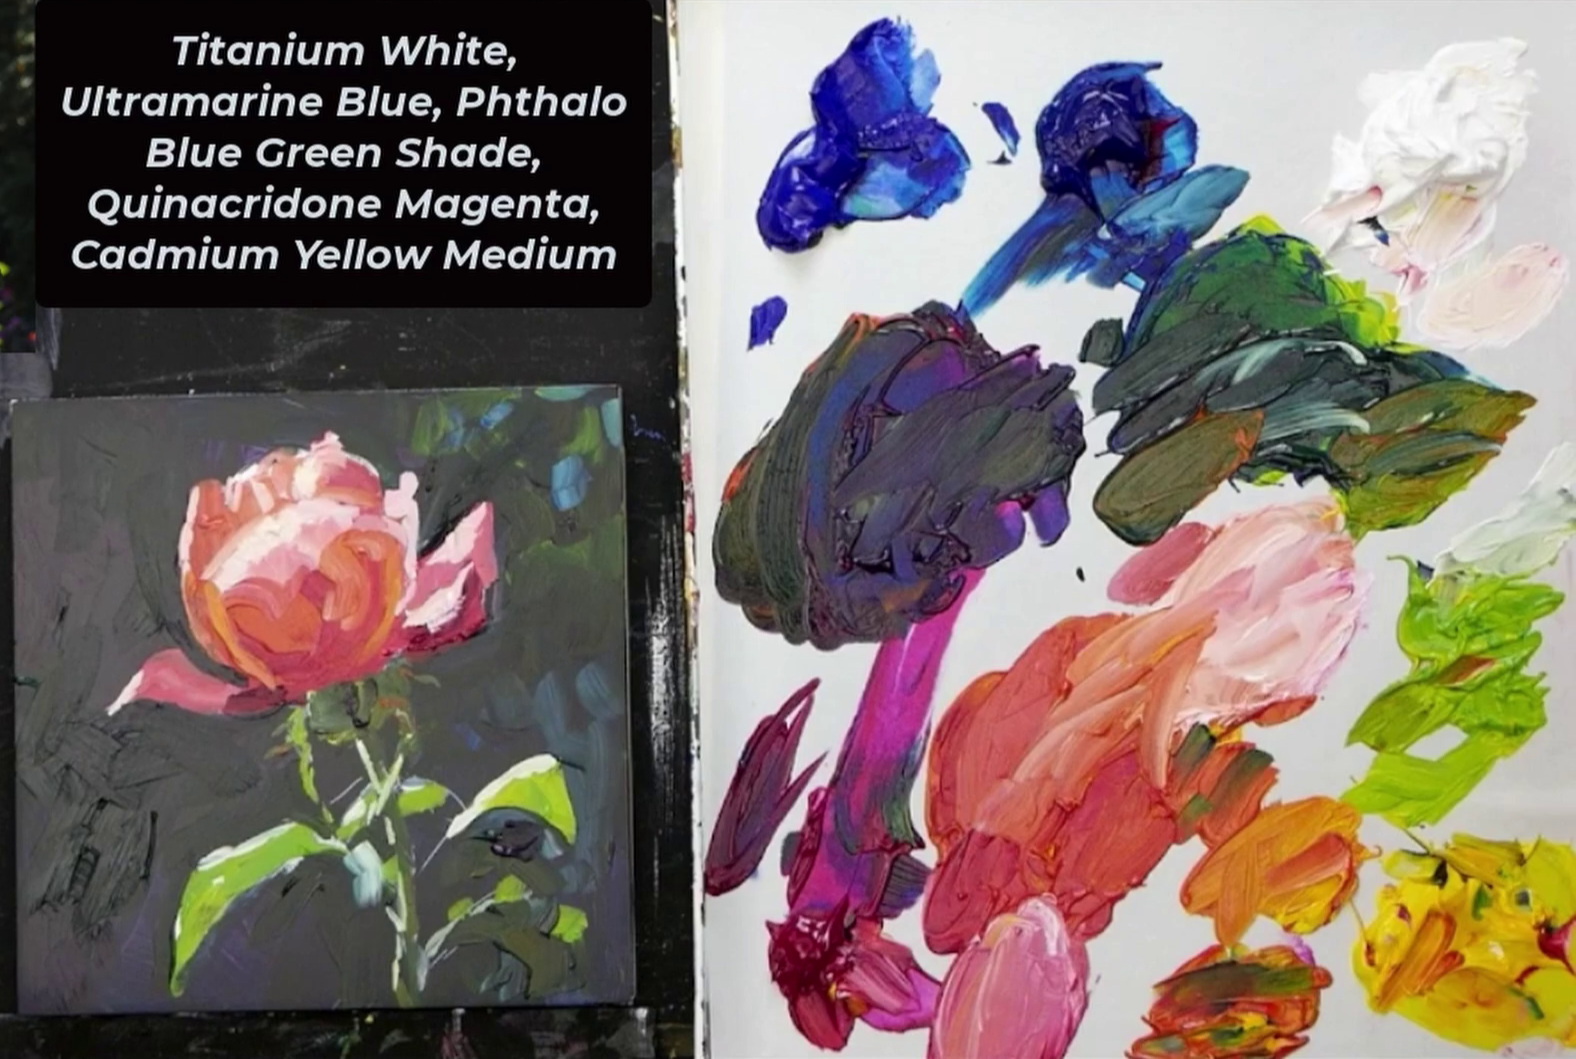
I know that using Phthalo Blue Green Shade is going to give me the lightest green shade. This will be good for the leaves of our rose that are in sunlight. Using a big scoop of our yellow and adding some Phthalo blue, we will create this very bright vibrant green color.
Scoop that color up and put it off to the side.
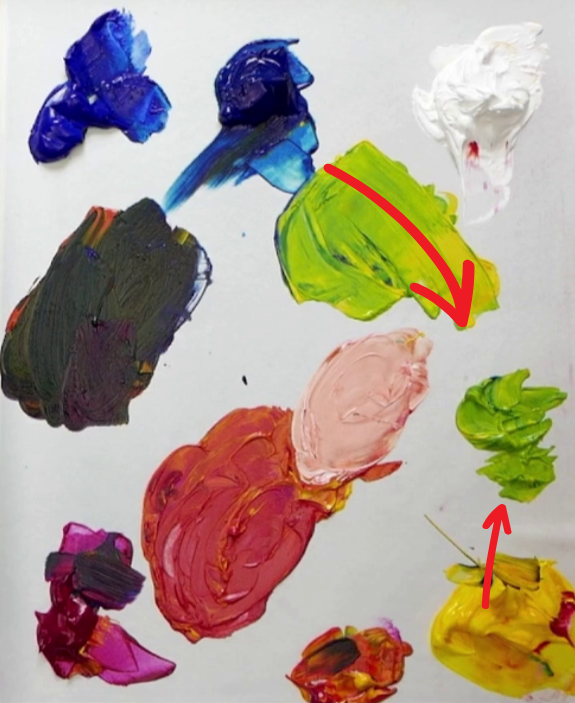
Next we are going to make our darker green shade for the shadow parts of our stems and leaves. We’ll be using Phthalo blue and yellow again, but this time we’ll be adding Ultramarine Blue as well. Ultramarine Blue is a darker color and will help darken our mix. Adding a touch of magenta will help darken the color and give it some cohesion with the color that we mixed for our blossom. Hooray for color harmony!
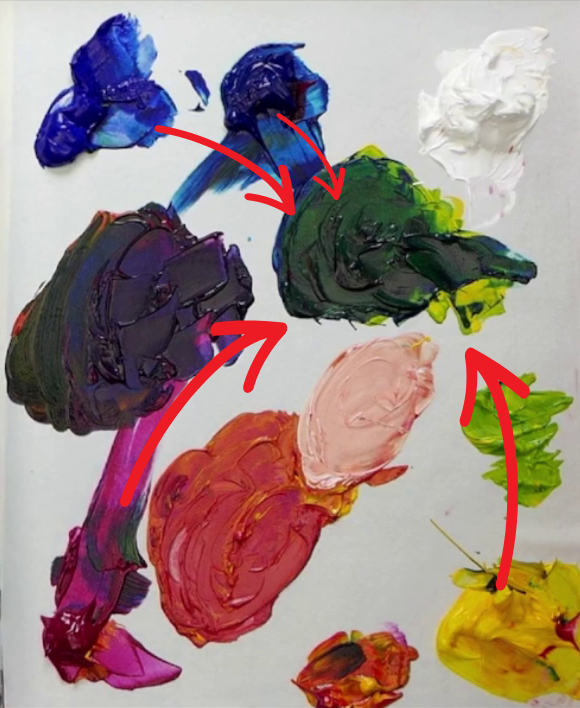
Mix 3: Background Colors
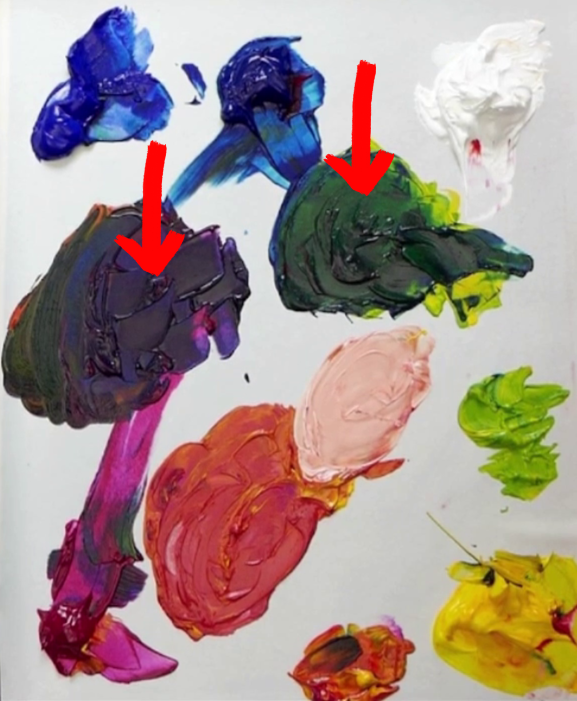
The last color I want to mix is a dark purple color. I will use this color in combination with the dark green color we just mixed to paint pieces of the background throughout the painting. Mix this up using equal parts Magenta and Phthalo blue.
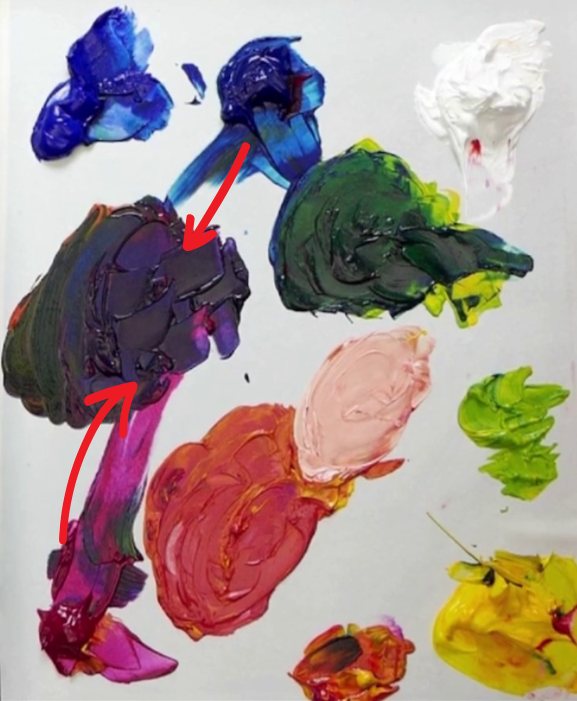
We will be alternating between this color and our dark green for our background.
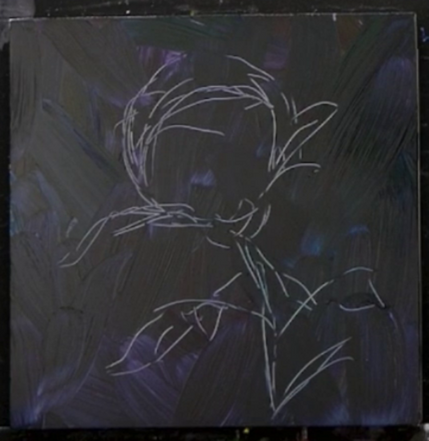
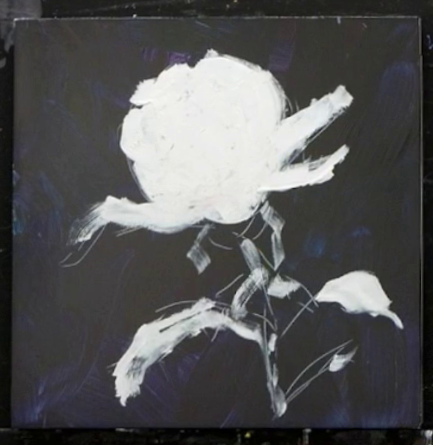
Now that we have the majority of our colors mixed up, I want to point out that Quinacridone colors are notoriously transparent and might be very hard to see over this dark background. We are going to get around that problem by sketching out our shape in white first. We will use white to sketch out the shape of your blossom, the petals and leaves around it. When you are done with this step, it should look something like this.
Let's Start Painting
With all of our prep work out of the way, let's start painting!
Using our red-orange color, we want to start blocking in the color of the shadowed portion of the rose first. You’ll notice in the image below that our shadow blossom color is only present at the very bottom of the rose. As you move your way up the petals, you’ll notice a color that’s in between our SHADOW blossom color and our LIGHT blossom color. For these colors, I just mix a little bit of both of our blossom colors together and adjust as needed.
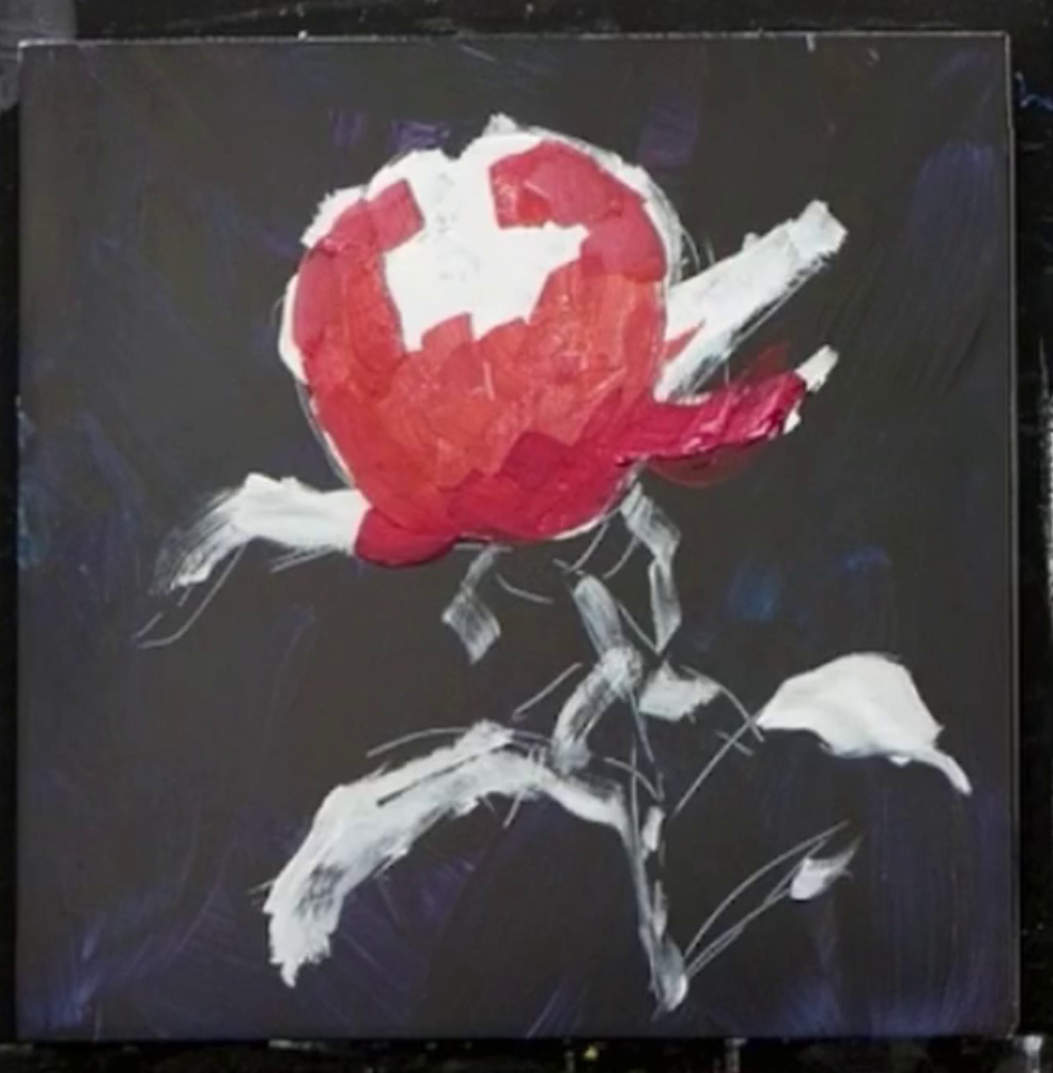
Next we’re going to paint the super bright sunny center of our rose. We’ll use our light blossom color for this. For the absolute brightest areas, also add a touch of yellow to our light blossom color. Here’s what I have so far:
With the rose blocked in, we will now start blocking in the leaves with our bright green shade. This part is super easy. Don’t worry too much about the shape of the leaves. You’re not worried about ‘staying in the lines’ or painting a perfect leaf shape. Let yourself relax, be bold and try to achieve that painterly look.
With those leaves in place, we’re going to start shaping the blossom some more.
To do this, we’ll use our background colors to ‘cut away’ at the rose in places where the shape isn’t to our liking. A good way to do this is by focusing on the specific shape of the petals themselves and the negative space behind your rose. Going back and forth between our deep purple and dark green shade, you are going to create those negative space shapes. You will start to see areas where you can correct the shape of the rose to make it more accurate.
Next we will focus on the underneath portion of our flower. The green shade is a warmer and darker green. Using a touch of our red orange color, we are going to mix that with some of our dark green to create the color for our stem.
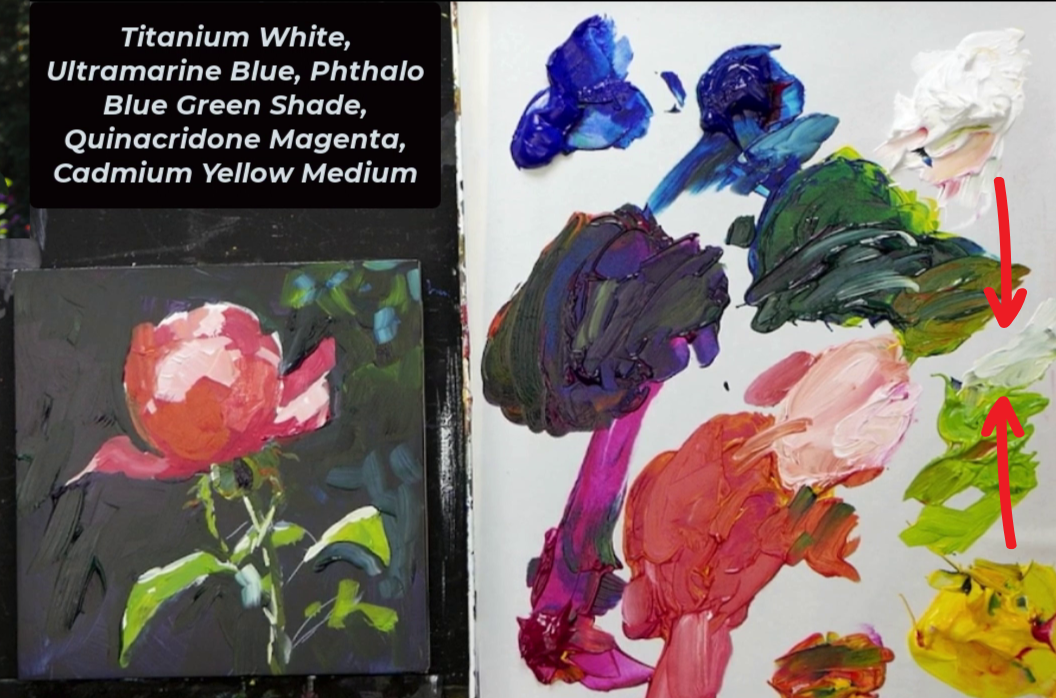
I want us to add a little bit of dimension to the background. The way we are going to do this is by adding those lighter leaves in the background in the upper right hand corner. We will use our bright green color first and just add a few short strokes.
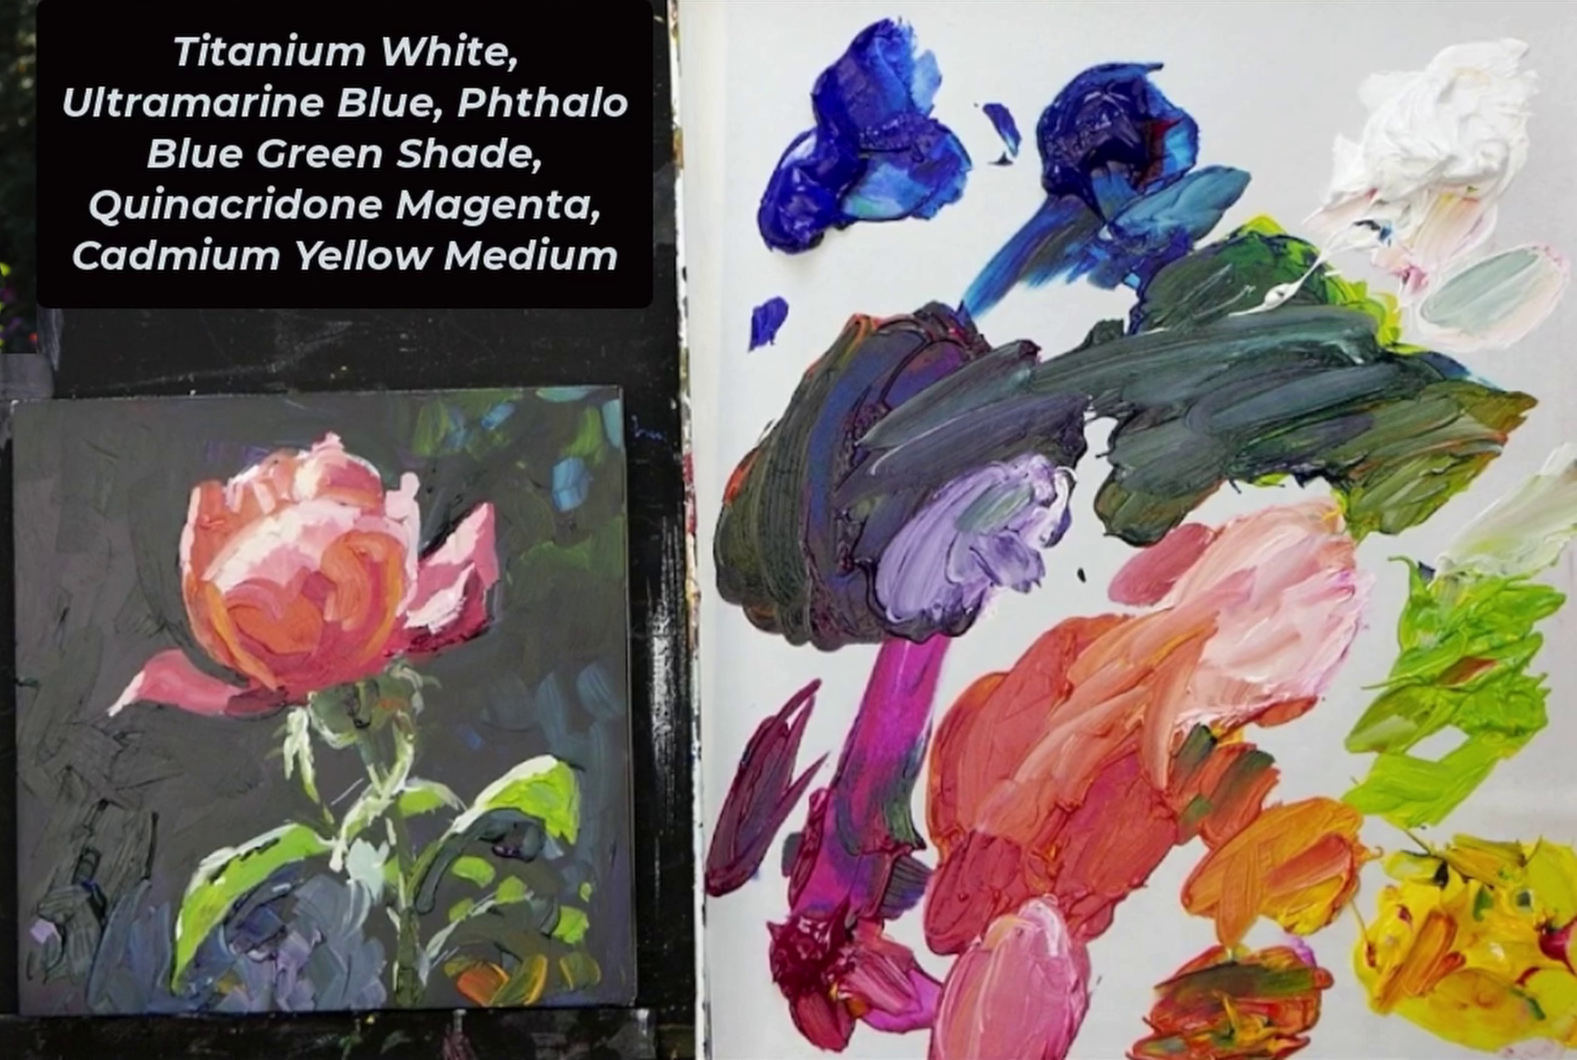
Next, to make the leaves blend into the background better, we are going to add a little bit of light blue. Mix up a light blue shade using Phthalo blue and white. Using our light blue, we are going to add some spots around and overlapping our green.
We are going to intensify the sun soaked areas on our leaves. Add some white to our bright green color. Use the side of your brush to paint across the top of the leaves.
Next, add the thin lines of the leaves hanging down from the blossom. Again, you can use the edge of your brush with a light green. If your paint brush is frayed, you can use a liner brush. During this step,
I would also like you to add the sunlight hitting the side of the bulb and stem on the left side. I would recommend using our bright green shade, a touch of yellow and a touch of white.
There is a very dark shadow covering the center portion of the bulb under our rose. We will use the deep purple color to add this contrast.
Now that we have blocked our main components of our flower. I want to go back in and continue adding details to make our rose look more realistic. A few examples of this would be going back in with our dark green and dark purple to correct the shape of our leaves. We can also intensify the shadow on our petals by using a tiny touch of Ultramarine blue and magenta to create a deep red color.
Unfortunately, I can’t go into detail here about every little change I am making to this flower. What I CAN do however is show you a few back to back images of the details I added along the way.
The more you can correct the shapes and colors you see in your reference photo, the more realistic it will become. This goes for not only the rose and leaves themselves but also the negative shapes around them.
Lastly, we will tidy up the stem and leaf area with our dark tones to carve in some negative shapes. By cleaning it up and removing some of the extra leaves, it simplifies the image for your eyes. If you compare our reference photo to our painting, you'll notice that we didn't keep every detail. But the main ones are there to make a beautiful composition.
It’s important to note that this is the way I paint a rose. Yours can look different and that's totally fine! It's all about your interpretation of the photo and what you want to say with your painting.
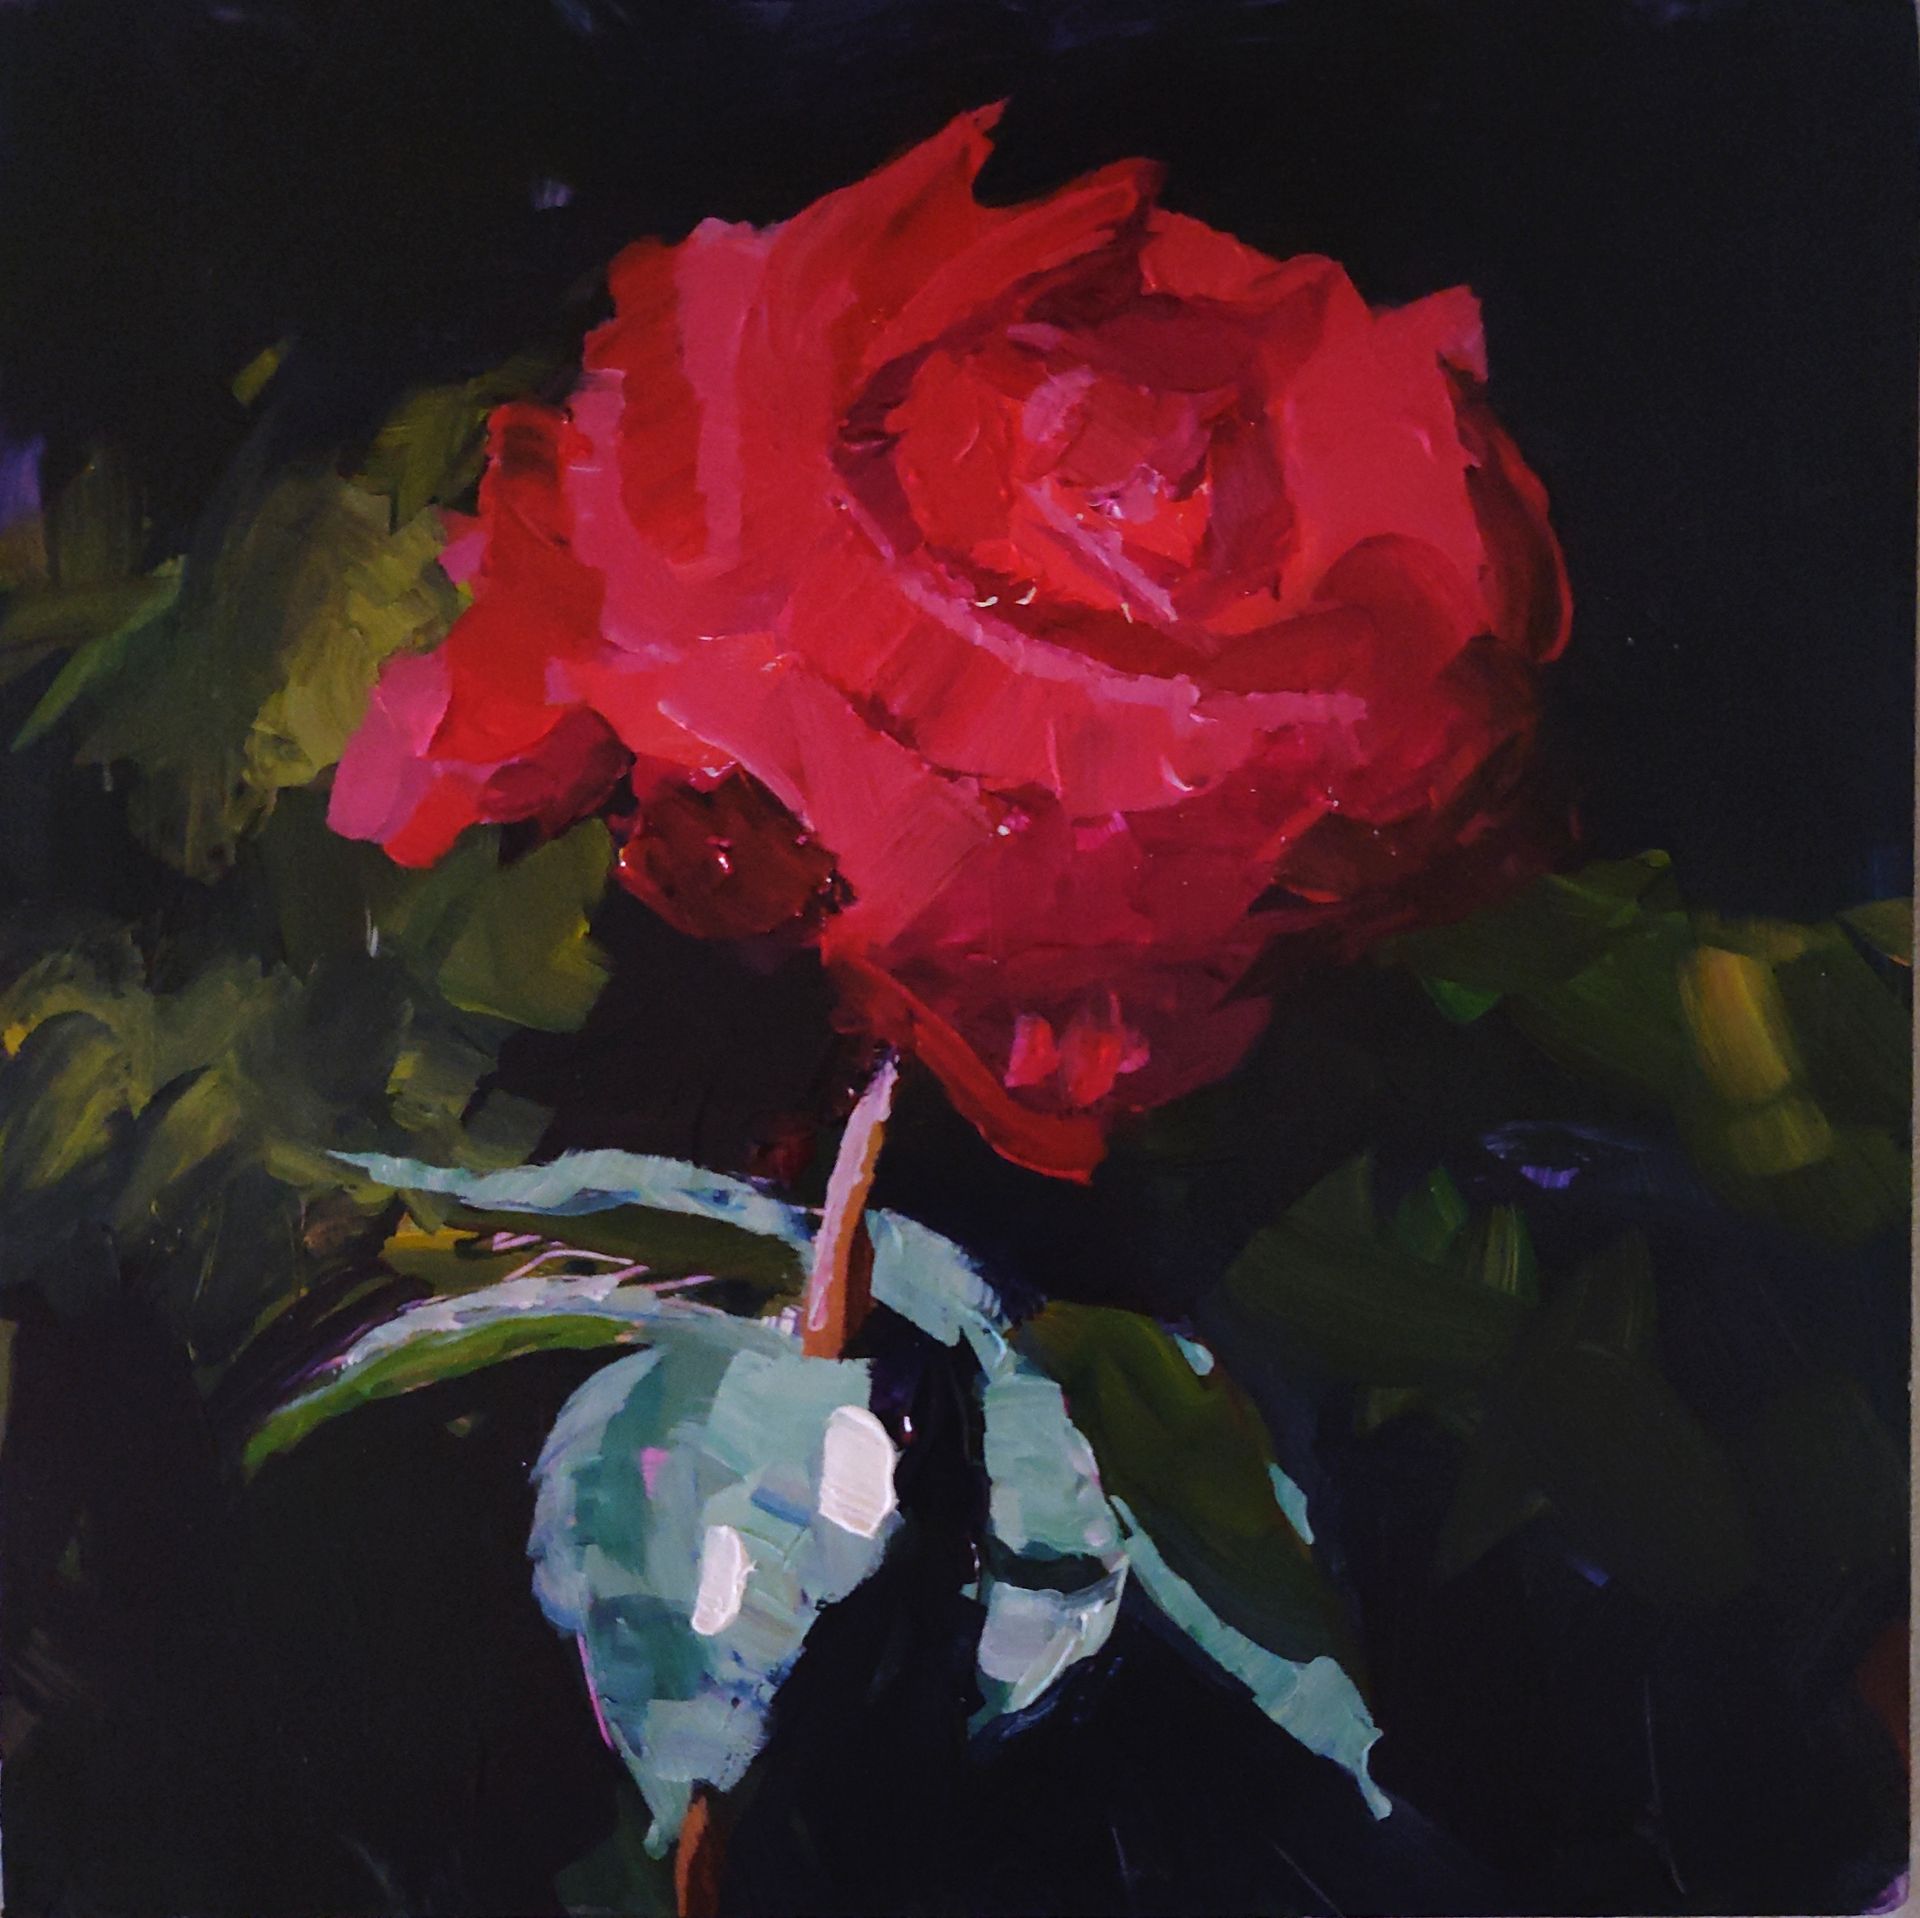
Here is my finished painting! I hope you enjoyed painting along with me.

This is just one of the flowers I painted in my 8-day flower painting course and challenge. If you want to paint more gorgeous florals, while seeing massive growth in your artwork, then this challenge is for you. Click the button below to check it out and reserve your spot!